Kitchen Reno: Brick Be Gone
DING DONG, THE BRICK IS GONE. Can I get a hallelujah??
After all of the demo prep work we did throughout the week, the actual demo took just a couple of hours. My brother and sister-in-law rolled up at our house shortly after 9:00 a.m. yesterday morning. Marie took Nora for a little one-on-one auntie/niece time, and Tyler stayed to help us out.
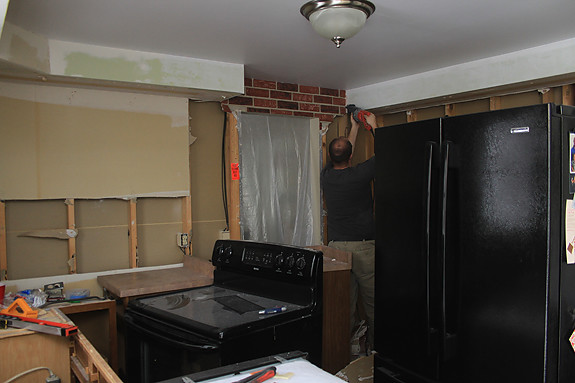
As a reminder, this is what the kitchen looked like on Friday night:

We got to work right away. Tyler helped us with disconnecting the plumbing under our sink, and getting the over-the-range microwave disconnected and uninstalled. The hardest (and scariest) part of the whole thing was removing our gigantic piece of countertop without breaking/damaging it. But, the three of us managed to support it in all of the right places and moved it into our front entryway successfully. So yep, our house pretty much looks like a war zone right now.
But DUDE. The brick is gone. So ‘sall good. :)
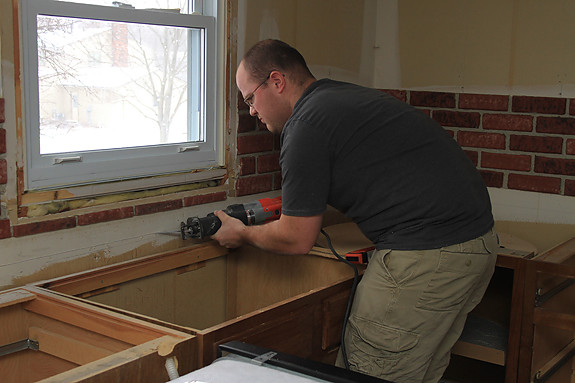
In the lead-up to all of this, Michael and I couldn’t decide which tool would be best for cutting the drywall. We didn’t want to remove ALL of the drywall in the room–just the parts with the brick. We did some asking around, talked to several workers at Home Depot, etc. The problem was that we didn’t want to invest in a tool that we didn’t have another immediate use for. So even though things like the Dremel Saw Max and the Dremel Trio sounded like they could be our answer, we hesitated.
Then, on our last trip to Home Depot this week, one of the guys there suggested that we just “score” the drywall with a sharp utility knife, and go from there. At the last minute yesterday morning, I texted Tyler and asked him to bring his sawzall, really as a “just in case.” As it turns out, this was the perfect tool for the job. Tyler was able to control the depth at which he was cutting pretty well just by feel, so being able to set a fixed depth (which is why we were looking into those other tools) was not an issue. It was certainly WAY FASTER than working with a freaking utility knife, so… yay!
Once Tyler cut our “seams” for us, things started moving very quickly. Soon, we (and by “we,” I mean Michael and Tyler, haha) were tearing off gigantic pieces of brick.

We were definitely not sad to see it go.
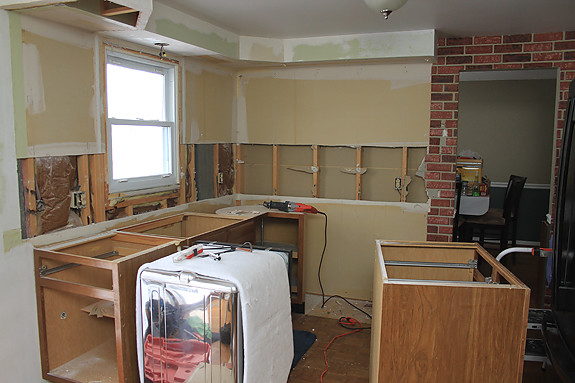
The brick “backsplash” on this side of the room was the first to go.

Then we tackled the “big wall.” For this wall, we actually did end up tearing the whole thing down to the studs, since the pattern of the brick was so erratic. If we had cut out only the brick, it would’ve been like putting together a puzzle with the new drywall and the old, and there would’ve been a lot of seams to mud/sand/finish. This way, we can use fewer, larger pieces of drywall when we go to put the new stuff up.
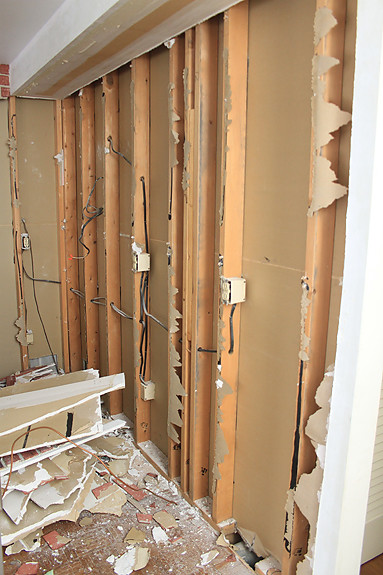
I never thought we’d be so happy to see studs. :)
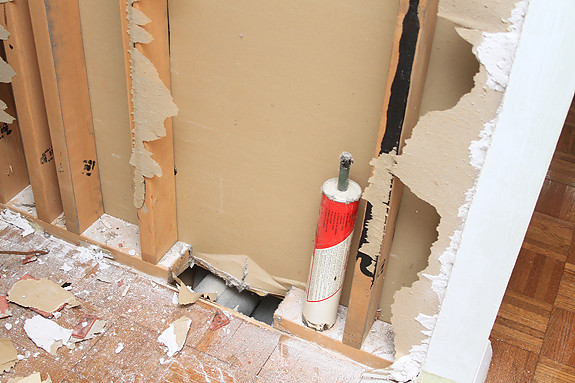
We also found this “gift” in the wall for us, from the original contractors who built the place. An empty tube of caulk/liquid nails material. From 1973. Couldn’t they have left us, oh, I don’t know, some cash? That would’ve been a fun find.
The last piece of brick we tackled was this spot above the doorway. It was firmly attached to two studs, so it was kind of a pain in the ass. But, with a lot of muscle, Tyler got it down, once and for all. And all of the brick-covered drywall went directly into the trash.
Onward and upward.
We had an electrician come today to take a look at things. We’re adding under-cabinet lights, and need to replace some of the outlets with GFCI outlets. We also want to move a few switches around, add a couple of new ones, etc. So, we’re hoping the electrician will be back to do that work sometime this week, so we can begin to put the walls back up on Saturday.
After all of the demo, we cleaned everything up pretty thoroughly, and organized the kitchen back into a relatively-operative configuration. The most disruptive thing is, of course, not having a sink or a dishwasher. TORTURE. We usually throw everything we can into the dishwasher, and run it every other day, if not more often. Now, we not only have to wash dishes by hand, but we have to do it in the utility sink in the basement. First world problems, I know, but still, I whine just a little. :)
For now, we just have to keep our fingers crossed the electrician can get his part done this week so that we’re not delayed from putting the walls back up on Saturday. The sooner we can get them back up, the sooner we can get our sink and countertops back. It’s the little big things, right?
3 Responses to Kitchen Reno: Brick Be Gone
Leave a Reply Cancel reply
About
 I'm Heather. I'm 33 and have been married to Michael for seven years. Together, we have two beautiful little girls we love more than anything, and a miniature dachshund who drives us crazy. I'm a full-time working mom who has very little time for my own "stuff" these days, like home improvement, cooking/baking, cake decorating, and photography. Despite the team not making the playoffs since 1999, I'm STILL a Buffalo Bills fan, which I think speaks to my loyalty AND sense of humor. I can't wait to pick up the pace with travel again some day... you know, when we're done being ruled by tiny fists. Welcome to my blog.
The Address
heatherdriveblog@yahoo.comHeather Drive Archives
Post Categories


Ahhhh I am so excited to see the finish result!
I have two words for you: disposable cutlery. Cheap, easy (ok, not good for the environment but certainly sanity saving). Seriously, get some and rid yourself of washing up until the kitchen is installed.
[…] real how-to on installing faux brick (list-worthy since most people I know, like our friends Heather and Mike, are removing it as fast as humanly […]