DIY Alphabet Wall
First, let me say thank you to all who left such kind comments on our playroom reveal post on Monday. It was so fun to finally be able to show you a little part of our house. Dare I say that it motivates me to finish other rooms just to be able to share those, too? :)
Anyway, I promised to follow up the playroom photos with some additional details about a few of the projects we completed for the room. The one that seems to garner the most interest from people–both online and in real life–is the alphabet wall.
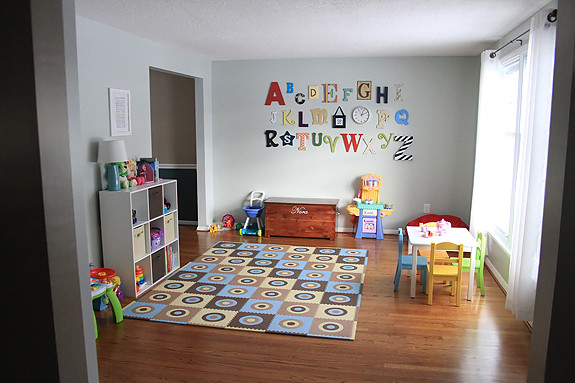
Honestly, our ABC wall made the room for us. It’s a pretty big wall, and before, it was a blank canvas, staring at us every time we were in there. Since it’s a playroom without any real furniture, there was nothing against the wall to “anchor” the whole thing, so it was tough to figure out what we wanted to do with it. We considered some other art–prints, mostly–but all of it seemed too small. And a lot of the art I’ve spotted and liked (like this) is expensive.
I had pinned a few alphabet walls on Pinterest (like this and this), and I kept coming back to them as a solution for our giant wall. At one point, I showed Michael the photos, and he was sold. That, in turn, sold me.
I immediately began to seek letters. I wanted to find as large a variety as I could, and I knew from experience with other letter projects (Nora’s name on her nursery wall, the D-A-D we did for Michael for Father’s Day) that Michaels and Joann Fabrics only had a few varieties. But at some point, someone (maybe Niki?) suggested Hobby Lobby.
I don’t even remember when Hobby Lobby opened locally, but there is only one here. It’s relatively new, at least, and the crafty girl inside me is ashamed to admit that I had never been. Although it’s not exactly FAR from where we live, it is somewhat of an inconvenience to get to, and Michaels and Joann’s are closer–so I just never really had a reason to go to Hobby Lobby before. My search for letters led me over there, however, and I will say that as soon as I walked in the door, I was blown away.
Why hello, Hobby Lobby. Where have you been all of my life?
Love at first sight, people. And, as it turned out, for good reason–because I hit the freaking jackpot for letters at this store. Every time I thought that I had definitely found every variety they had, I stumbled upon another. That was the only complaint I had: their letters were scattered all over the store, not just in one easy-to-browse section. BUT let’s just say that I was not exactly sad about having an excuse to scour every inch of the store.

After initially collecting something like 15 different letters at Hobby Lobby, we made separate trips to Michaels and Joann Fabrics to round out our alphabet collection. Over the course of a week or so, we collected everything we needed.
To decorate each letter, we also picked up a variety of acrylic paint colors (some I already had in my stash, others we picked out new), and some fun scrapbook papers. Then, we got to work. We spent several of Nora’s naptimes and evenings decorating our letters. First, we laid them all out in order and I mapped out a plan to utilize a variety of patterns and colors. I made note of the color or scrapbook paper that we planned to use for each letter, and we did our best to envision what the finished product would look like (it was impossible).
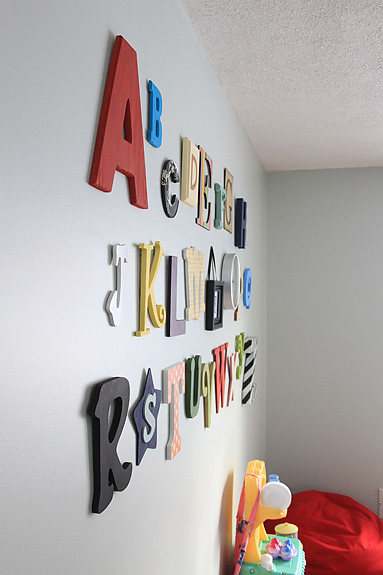
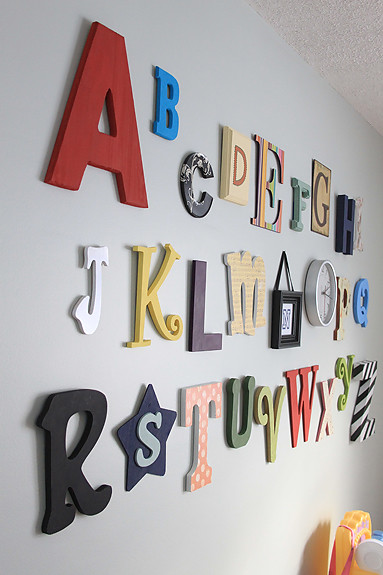
Many of the letters were simply painted. With others, we painted the edges (or left them plain) and then I covered the front of the letter with scrapbook paper using Mod Podge. I used a foam brush to spread Mod Podge on the letter, placed it face-down on the back side of the scrapbook paper, and spread out any crinkles the best I could. Then, after letting it dry for several minutes, I used an exacto knife to trace the letter on the paper, cutting away the excess paper. Once I was done cutting, I covered the top of the paper (the front of it, the nice decorative side) with a layer of Mod Podge to seal everything and give it a nice protective finish.
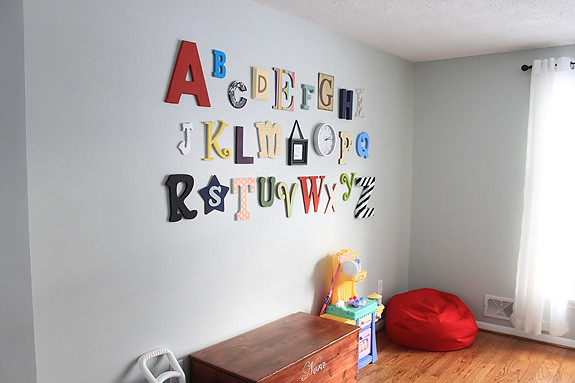
Some of the letters were super easy, because they were already complete when we bought them (such as the C, the G, the N–printed on our computer, the O–a clock!, and the R–left unpainted).
I actually spray painted the J and the Z. The J is just plain white semi-gloss spray paint, so that was simple. With the Z, I first spray painted it all white, let it dry for 24 hours, and then taped stripes on it with painter’s tape. Then I used black semi-gloss paint to spray it again. Once dry, I peeled off the tape, and ta-da! Zebra print.
Once the letters were all finished, it was time to figure out how to hang them all. First, we laid them out in a “pattern” on the floor to determine how many letters to put in a row, how much space to put between them, etc. I took photos of our layout on my phone to reference as I did the hanging.
Then, we had to actually attach hanging hardware to each of the letters. You know, the little hooks that are on the back of picture frames? A lot of the letters didn’t have those, so we had to add them. We bought a variety of picture hanging hardware at Hobby Lobby, and I used different ones, depending on a lot of factors–the thickness of the letter, the amount of space on the back, etc.
Finally, it was time to hang everything.
It actually really wasn’t that bad, but I did do it over a period of about 3-4 days. As you can kinda-sorta see in the slideshow (and in the photo below), we utilized a laser level for the top row to make sure we were working on a straight line. We also taped a yard stick to the left side to mark the left edge, and used painter’s tape to mark the right edge. The goal was to hang all of the letters, fairly evenly, and space them out to span the entire length between the yard stick and the painter’s tape.
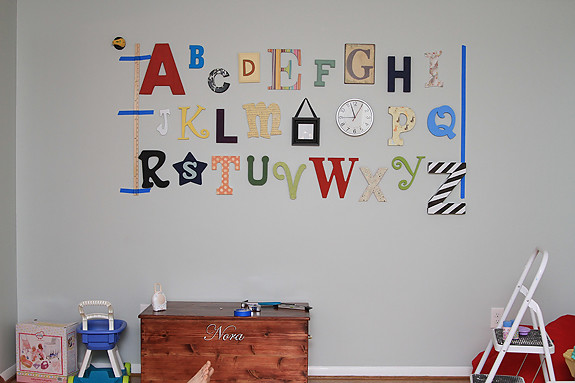
And then our alphabet wall was finally DONE! So we stood back and admired it. Every day. We still do. :)


Time consuming, but worth it. And educational, too. We’re working on teaching Nora each of the letters already. (Just kidding. Kind of.)
Don’t forget to enter the giveaway for a monogrammed MINT cosmo bag from Penguin Personalization! It ends Friday, you know.
9 Responses to DIY Alphabet Wall
Leave a Reply Cancel reply
About
 I'm Heather. I'm 33 and have been married to Michael for seven years. Together, we have two beautiful little girls we love more than anything, and a miniature dachshund who drives us crazy. I'm a full-time working mom who has very little time for my own "stuff" these days, like home improvement, cooking/baking, cake decorating, and photography. Despite the team not making the playoffs since 1999, I'm STILL a Buffalo Bills fan, which I think speaks to my loyalty AND sense of humor. I can't wait to pick up the pace with travel again some day... you know, when we're done being ruled by tiny fists. Welcome to my blog.
The Address
heatherdriveblog@yahoo.comHeather Drive Archives
Post Categories


I LOVE it! I want to do an alphabet wall for my son’s bedroom! If you don’t mind me asking, how much did this cost?! I’ve seen letter sets being sold for about $90 and I’m wondering if picking up the letters individually will be more or less than that. THANKS!
Amazing stuff Heather! I want to do an alphabet wall too! :)
I don’t think that I’d be able to find so many cool letters though.
It looks awesome, seriously!
Thank you for posting this! It looks amazing and I bet it will be even more wonderful once Nora starts learning her letters!
i’m in love with your playroom! the alphabet wall, the floor foam tiles, the magnet board, everything. can you do a post about making the magnet board? i’m not on pinterest!
@Ashley–I didn’t keep very good track, but Michael thinks we ended up spending around $100 when you account for all the letters, and the supplies (paint, scrapbook paper, picture hanging hardware, the hooks + nails, etc.). I saw a few completed sets online–painted and everything–but they were running for like $275 and we would’ve had to wait like 12 weeks for our order to come in. We were tempted, but we were too impatient. Plus, it was hard to justify paying that much for something we could do ourselves for so much cheaper.
@Vanessa–You might be surprised! You could also order letters online, so check out your options.
@Amy–Thank you!
@Basebell–Sure thing. That’s actually in the works and should be posted very soon. :) And thanks.
so super cute. I can’t wait to do this in my little mans big guy room.
This is so timely and great. I just got done painting the letters for my nursery and was wondering how to hang them. I really did not want to have a bunch of holes in the wall, but if I want them secure I guess I will have to. Thanks for the tutorial. Hopefully i can get my wall done this weekend.
Hi Heather! The alphabet wall looks amazing!!!! Thanks for the detailed information about how to recreate one! My son is 14 months – and he can recognize letters – so it’s not too early to teach Nora! He learned more from exposure then direct instruction!
I bought him these books when he was 6 months old – and just read them to him for fun. Last week we were playing and I said: find me the “b” – and he grabbed the right book! We did it with the entire alphabet!! I was amazed!!
http://www.amazon.ca/Baby-Einstein-Alphabooks-Julie-Aigner-Clark/dp/0786819073
Thank you SO much for taking the time to write this out, and for the pictures of the hanging steps. What an inspiration! I plan on making one in a few months and now I feel more prepared. :)