
Tomorrow morning, we will fly to Charlotte for a surprise birthday party for our friend, Dave. Dave is one of Michael’s friends from college (Dave graduated before Michael and I met), and part of a good group of friends that we try to get together with whenever we can. Some are local, some are not. Dave and his wife (whom we are also friends with), Lynsay, live in Charlotte.
Back in July, Lynsay e-mailed me to say she was planning a surprise party for Dave in October. Michael and I discussed it, and almost immediately decided to book tickets to attend. We have been meaning to get down to Charlotte to visit Dave and Lynsay for a few years now, and this was the perfect reason to actually go.
Since Dave is a big Buffalo Bills fan (hmm, who else do we know like that?), Lynsay decided to give the party a Buffalo Bills theme. Several weeks ago, I came up with the idea of making Buffalo Bills cookies to bring down with us for the party. I made the Halloween cutouts as practice.
.jpg?w=595) This week, I’ve been working on the cookies almost every night. On Sunday night, I made the dough. On Tuesday night, I baked the cookies, made the frosting, and started by frosting the footballs. On Wednesday, I finished the footballs, and started the helmets. Tonight, I finished the helmets by writing “Bills” on each of them. Spreading out the work was such a good idea. They weren’t nearly as tedious to decorate as the Halloween cookies since I didn’t try to do it all in one sitting.
This week, I’ve been working on the cookies almost every night. On Sunday night, I made the dough. On Tuesday night, I baked the cookies, made the frosting, and started by frosting the footballs. On Wednesday, I finished the footballs, and started the helmets. Tonight, I finished the helmets by writing “Bills” on each of them. Spreading out the work was such a good idea. They weren’t nearly as tedious to decorate as the Halloween cookies since I didn’t try to do it all in one sitting.
.jpg?w=595)
Anyway, they are done and packed up REALLY well so that they hopefully make it down to Charlotte unscathed.
(UPDATE: Success! Not a single broken cookie. And also, they were a HUGE hit with everyone at the party. I heard several people ask, “Where did Lynsay get the cookies?”)
.jpg?w=595)
I had someone ask me how I make my royal icing. I follow the Wilton recipe that I learned in my cake decorating classes.
Wilton Royal Icing
(Yield: Approximately 3 cups)
Ingredients:
– 1 lb. powdered sugar
– 3 level tbsp. meringue powder
– 5-6 tbsp. lukewarm water
Directions:
1. In large mixing bowl, combine powdered sugar and meringue powder. Using electric mixer, mix until well blended.
2. Add water. Beat on medium-high speed for 7-10 minutes, or until icing loses its sheen.
NOTE: This recipe makes stiff to medium consistency royal icing (depending on how much water you use). To thin it out, you just add more water. Add water little by little (teaspoon by teaspoon) because a little bit goes a long way toward thinning it.

I also had someone ask me how I get the colors so dark. The answer is that I use a LOT of coloring. I haven’t had any problems with the coloring altering the taste. Red and black coloring tend to be the most bitter tasting, but to avoid my icing tasting bitter, I use other colors to darken the icing before trying to make it red and black.
For instance, when making red, I use rose pink to make the icing a really dark pink before I start adding red. Then, I use a combination of Wilton’s “no taste” red, and Christmas red, just adding a LOT of it until it is the color I want. Also, you should let your colors sit for a while before using, because they do tend to darken with time.
Another hint: For black, I mix a bunch of darker colors together first. Green, blue, purple, brown, etc. Once it’s a dark, ugly color, I start adding black. Again, it still takes a lot of coloring, but I have never had my icing taste nasty because of the color.
.jpg?w=595)
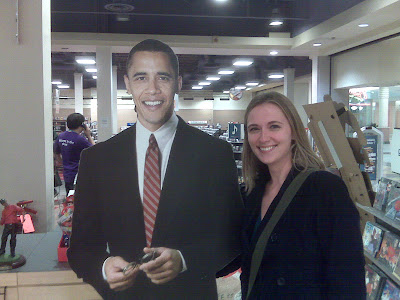
Saw Barack Obama at the mall tonight. He wasn’t as tall as I thought he would be. Hmph. I told him he’s the man.
John McCain was on the other side of the counter and there was no one getting their pics taken with him. Poor guy.
:)
Less than two weeks! Come on, America!
Sent from my Verizon Wireless BlackBerry
 Over the weekend, I finally finished reading my most recent book. I’m part of an online book club and this was the September/October selection. The beauty of a book club: I never would have chosen to read this on my own, but I actually really liked it and am glad I read it.
The Road is the story of a man and his son, traveling the road to the coast and just trying to survive after the apocolypse. We don’t know what exactly has happened to the world, but it’s clear from the very beginning that the world has become a very dark and difficult place. We learn that the Earth has been like this for several years, and there are very few people left alive. The boy was not born until after the apocolypse, so while the man remembers life when it was good, the boy knows no different.
This is definitely not a light, fun, beach read or anything like that. But it’s a beautifully written story about the love and the bond between the man and the boy (the author does not give them names).
The first 20-30 pages, I was not convinced that this was such a great book. But I kept reading, and I eventually found that I was hooked. I wanted to know where they would end up next, what they would see, how they would find food to live on. I wanted to know whether they would run into criminals, good people, or if they would ever find the place that they sought.
The author paints a picture of a world that I think we all (to some extent) fear. Imagine a situation in which all you have is your son. Your only mission for each new day is to keep moving and surviving. Your only belongings are the things you find and can fit into a single shopping cart. Your only hope is that you may find some section of the world that has not been destroyed. To find people who are good, not evil.
The Road is set to be released as a movie (starring Viggo Mortensen), most likely sometime in 2009. Do yourself a favor; read the book before seeing the movie!
As I do with almost all of my books, I purchased my copy from amazon.com.
If you do end up reading this (or have read it already), feel free to come back to discuss it in the comments.
We’ve been married four months today. A third of a year!
 We’ve officially made it longer than most Hollywood couples. Go us.
P.S. Our friends, Kristin and Keith, welcomed a beautiful baby girl to the world today. Emma Rose. Big baby girl weighed in at 8 lbs., 14.5 oz. :) Happy Birthday, Emma!
I love potatoes. Any way you make them, I’m more than likely going to love them.
Last month, while we were in the Poconos, I made potatoes like I hadn’t made them in a really long time. Cut up small, lots of spices, and baked until they are crispy. I was reminded of how good they are, so Michael and I vowed to make them again soon.
We had half a bag of potatoes left from the chowder we made a couple of weeks ago, so last night was the night for homemade homefries! We made turkey bacon BLTs, and had these on the side. The nice thing about this “recipe” is that it can be so easily adapted to accommodate individual tastes. There are so many different herbs and spices you can use on potatoes.

Crispy (Baked!) Homefries
Ingredients:
– 2-2.5 lbs. potatoes (We used Yukon Gold, but any variety will do. In the Poconos, we used red potatoes, which were equally as good.)
– Olive oil
– Garlic powder
– Garlic salt
– Black pepper
– Oregano
– Parsley
Directions:
1. Preheat oven to 450 degrees. Spray baking sheet with cooking spray.
2. Rinse potatoes and (if desired) peel. Cut potatoes into small chunks. Be sure to cut them all so they are relatively the same size.
3. In large bowl, combine potatoes with the rest of the ingredients. Drizzle liberally with olive oil. Add in garlic powder, garlic salt, black pepper, oregano, and parsley (to taste). With your hands, toss potatoes to coat them with herbs and spices.
4. Pour potatoes onto baking sheet and spread evenly.
5. Bake for 40-45 minutes or until crispy, flipping with spatula every 15-20 minutes. Baking time will vary depending on size of potatoes and individual oven. If potatoes do not become crispy on their own, throw them under the broiler for an additional 5 minutes after baking.
 (The potatoes before going into the oven.)
About
 I'm Heather. I'm 33 and have been married to Michael for seven years. Together, we have two beautiful little girls we love more than anything, and a miniature dachshund who drives us crazy. I'm a full-time working mom who has very little time for my own "stuff" these days, like home improvement, cooking/baking, cake decorating, and photography. Despite the team not making the playoffs since 1999, I'm STILL a Buffalo Bills fan, which I think speaks to my loyalty AND sense of humor. I can't wait to pick up the pace with travel again some day... you know, when we're done being ruled by tiny fists. Welcome to my blog.
